5.3 Program management
User can edit the program ,view ,audit and publish in the program management page.
5.3.1 Create new program
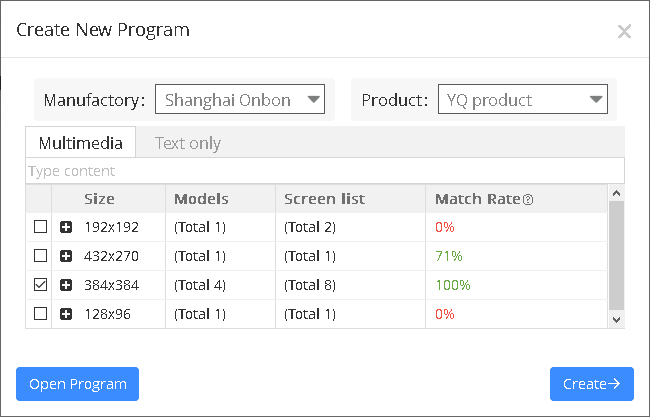
The user can create new program and modify operation in the "program management" page .If the user wants to create a new program, click on the navigation bar on the left in the "programming", as shown in picture 5.3-1, page will display window to create a new program,select controller manufacturers, controller product series, program types and size of drawing board to create a new program.
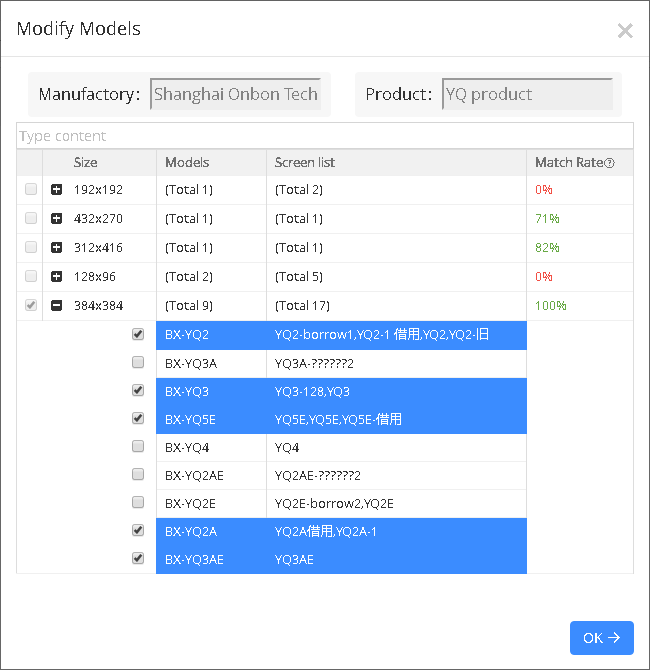
Users can add many drawing boards with different sizes in “Multimedia”, the platform will count the matching rate between drawing boards and screen, and if the matching rate is over than 60%, the programs can be sent to the corresponding size screen by self-adaption. Programs which are made by text only, can be 100% matching.
picture 5.3- 1
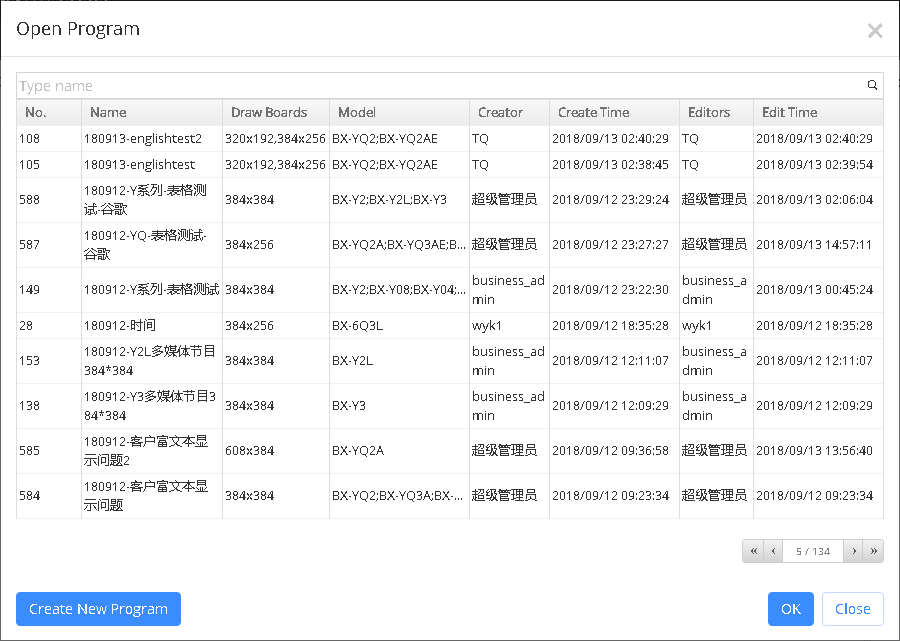
If users want to modify the original program ,can create new program in the”open program” then will display the current program like shown in the picture 5.3-2,click the “create new program”,then will return the window for creating new program.
picture 5.3- 2
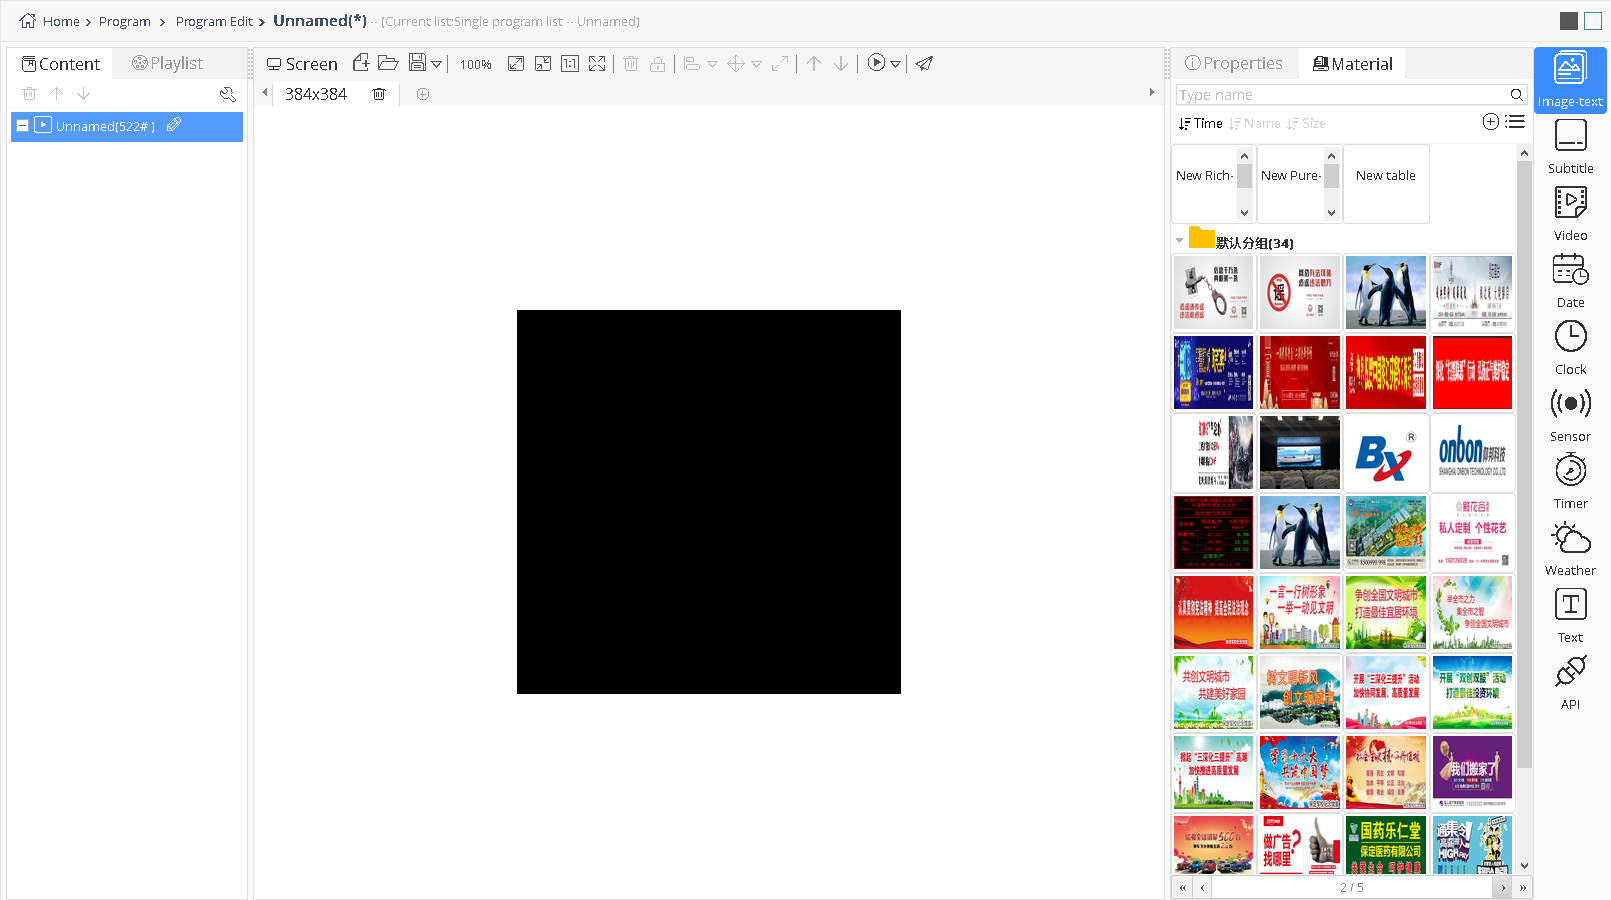
After create the new program then turn to the make program page ,including right,middle and right parts ,as shown in picture 5.3-3.
picture 5.3- 3
1. Left side of page
Left side of page including program items and playlist items ,playlist is at left of the page as shown in picture 5.3 4, users can check all the playing program also can edit other program.

picture 5.3- 4
The content bar is used to display the program's tree structure, as shown in picture 5.3-5, and some of the buttons are annotated as shown in table 5.3-1.
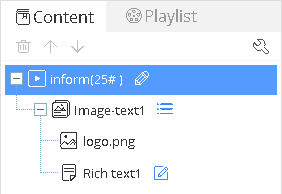
picture 5.3- 5
| button | function |
|---|---|
 |
delete |
 |
Up Down button ,Edit the position of material |
 |
Edit program name |
 |
Edit list ,display material list under current area |
 |
Content setting ,can open the content interface ,see picture 5.3-6 |
 |
Edit button,edit text and table |
table 5.3-1 content button function notes
2. Middle of the page
Middle of the page constructed by the screens used for partition and display effect like shown in the picture 5.3-6, the button notes like in table 5.3-2. the black background is screen, user can edit the zone, and also can add or delete drawing board.
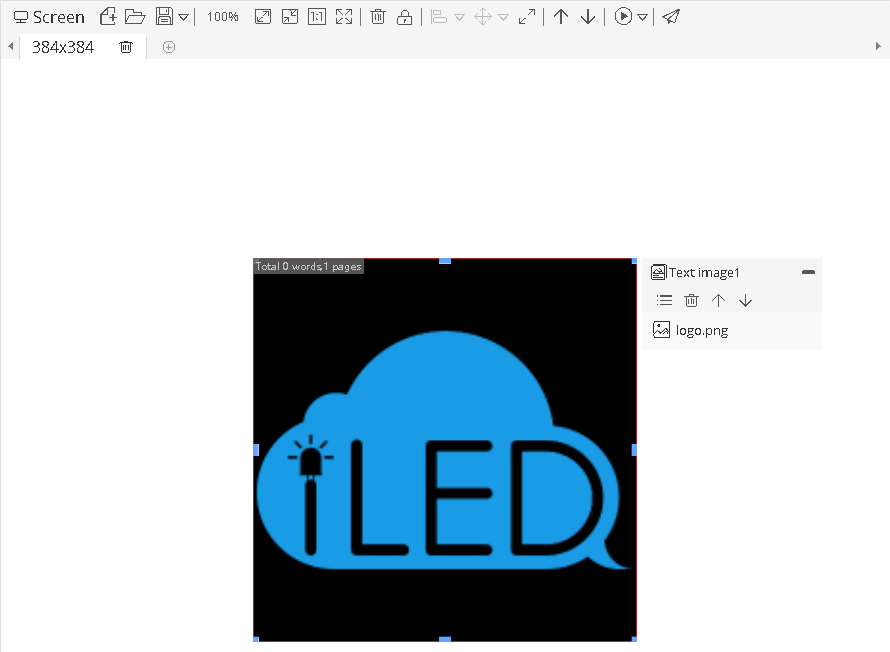
picture 5.3- 6
| Button | Function |
|---|---|
 |
create new program |
 |
Open program |
 |
Save program(There are save as and delete program button in sub menu) |
 |
Zoom rate, showing the scale of the current screen, and manually adjusting |
 |
Zoom up screen |
 |
Zoom down screen |
 |
1:1 display screen |
 |
full screen display |
 |
delete the partition |
 |
locked ,move after unlocked |
 |
Alignment, can set alignment at same time by select multiple partitions(There are a variety of alignments in the sub menu) |
 |
size of assimilation, can remain consistent size, the width or height of the selected multiple partitions.(There are a variety of size assimilation in the sub menu) |
 |
partition can expend to full screen |
 |
move up and down, can change the selected partition construction location |
 |
Non gray scale program preview button,preview different color based program effect (Please choice single color ,dual color and tri color button in sub menu) |
 |
play the program to preview(There are accelerate display ,normal display ,accelerate display button in sub menu) |
 |
Release program |
table 5.3-2 screen button function notes
3. Right of the page
Right of the page including the zone ,properties zone and material zone. It will show the corresponding zones, as shown in picture 5.3-7,each zone have different effect ,user can use double click or drag to add zone.(v1.0.40 platform has deleted the picture zone and text zone, v1.0.42 platform has added the local live zone, v1.4.4 platform has added the voice zone and restored the text zone, v1.4.5 platform has merged the simple image-text zone and the rich text zone into the image-text text, v1.5.3 platform has added the colorful font zone)

picture 5.3- 7
In the material items,there is different material for different partition as shown in picture 5.3-8,user can use right click ,double click or drag function to add material.also use can add material by click add button as shown in picture 5.2-19.
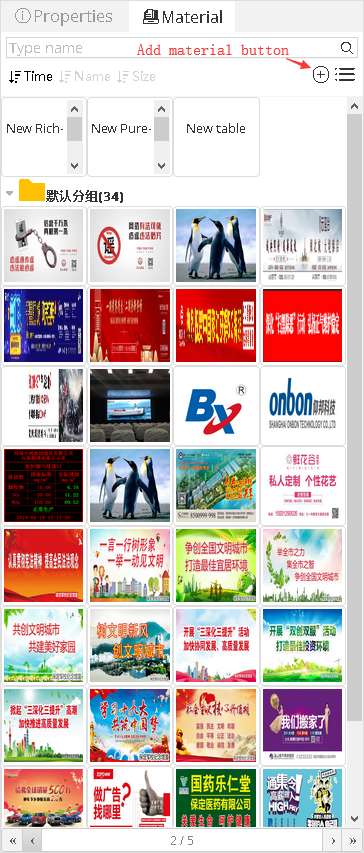
picture 5.3- 8
In the attribute items will display current program and attribute value,here take program attribute as an example as shown in picture 5.3-9,user can use the device model to setup .when reset ,user only can select the device model same as the program size .as shown in picture 5.3-10.The new "setup time duration" attribute will only work if the program is posted to the syncing screen.
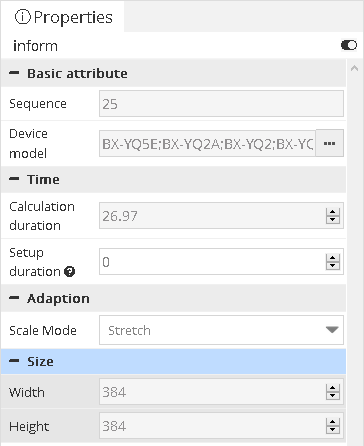
picture 5.3- 9
picture 5.3- 10
5.3.1.1 Release in the making program page
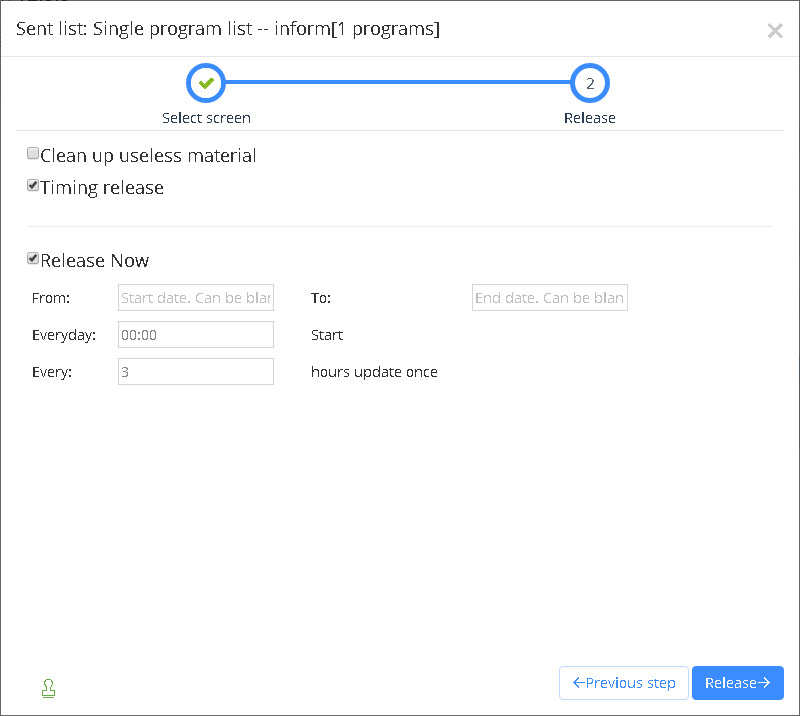
Users can release the program by clicking the release button then enter into the release guide .In the play settings, Users can select the corresponding screen, like picture 5.3-11, under “Usable screen”it will show the screen which is 60% matched with program, and it is also the screen which is supported by the program; Under “All screen”, like picture 5.3-12, it will show all the programs under this account, and the reasons why it cannot be used. If users select “release directly” and click “Finish”, then, it will release immediately; If users check the "Clean up useless material" option, will clean the old program then release the new program.
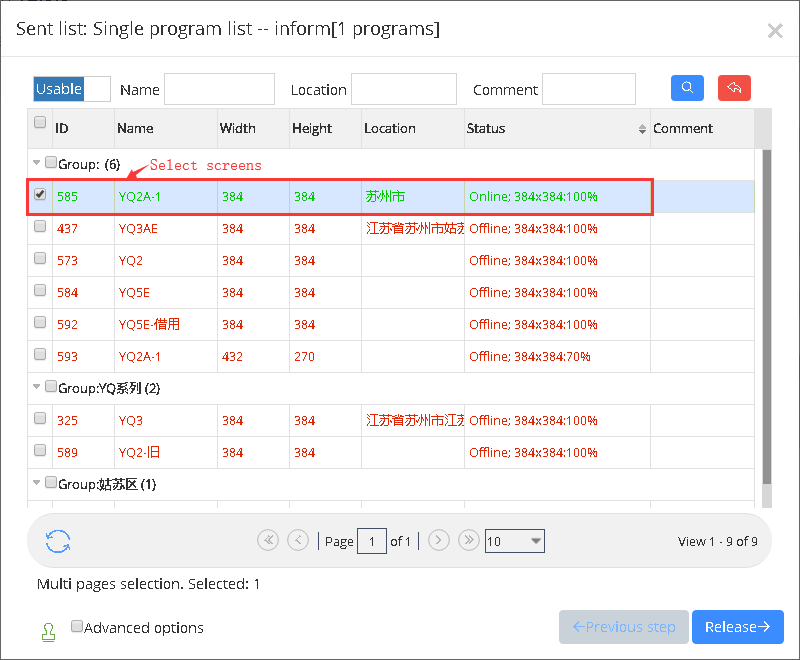
picture 5.3- 11
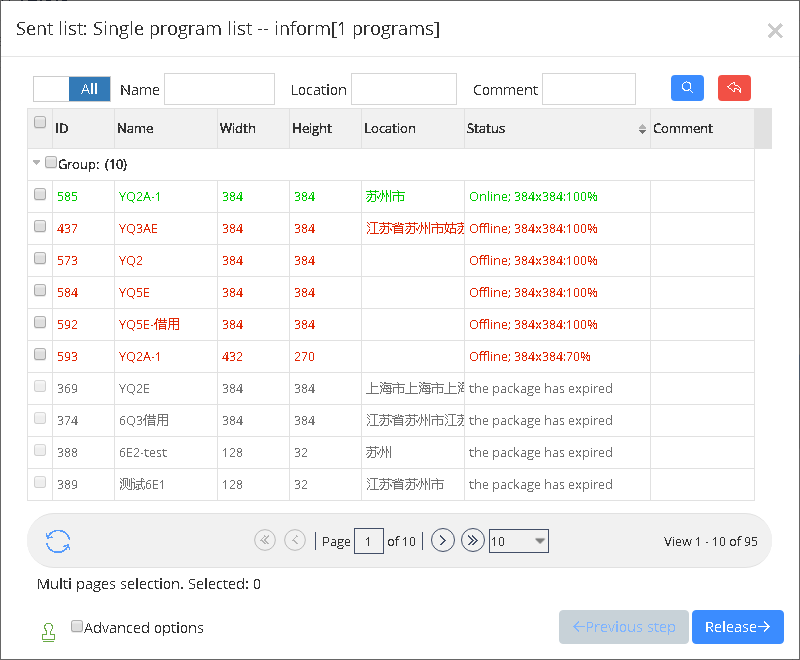
picture 5.3- 12
picture 5.3- 13
Users can also release playing list on “Programs”, like picture 5.3-14: switch to “playing list” page, click the playing list name, and then click “release” button.
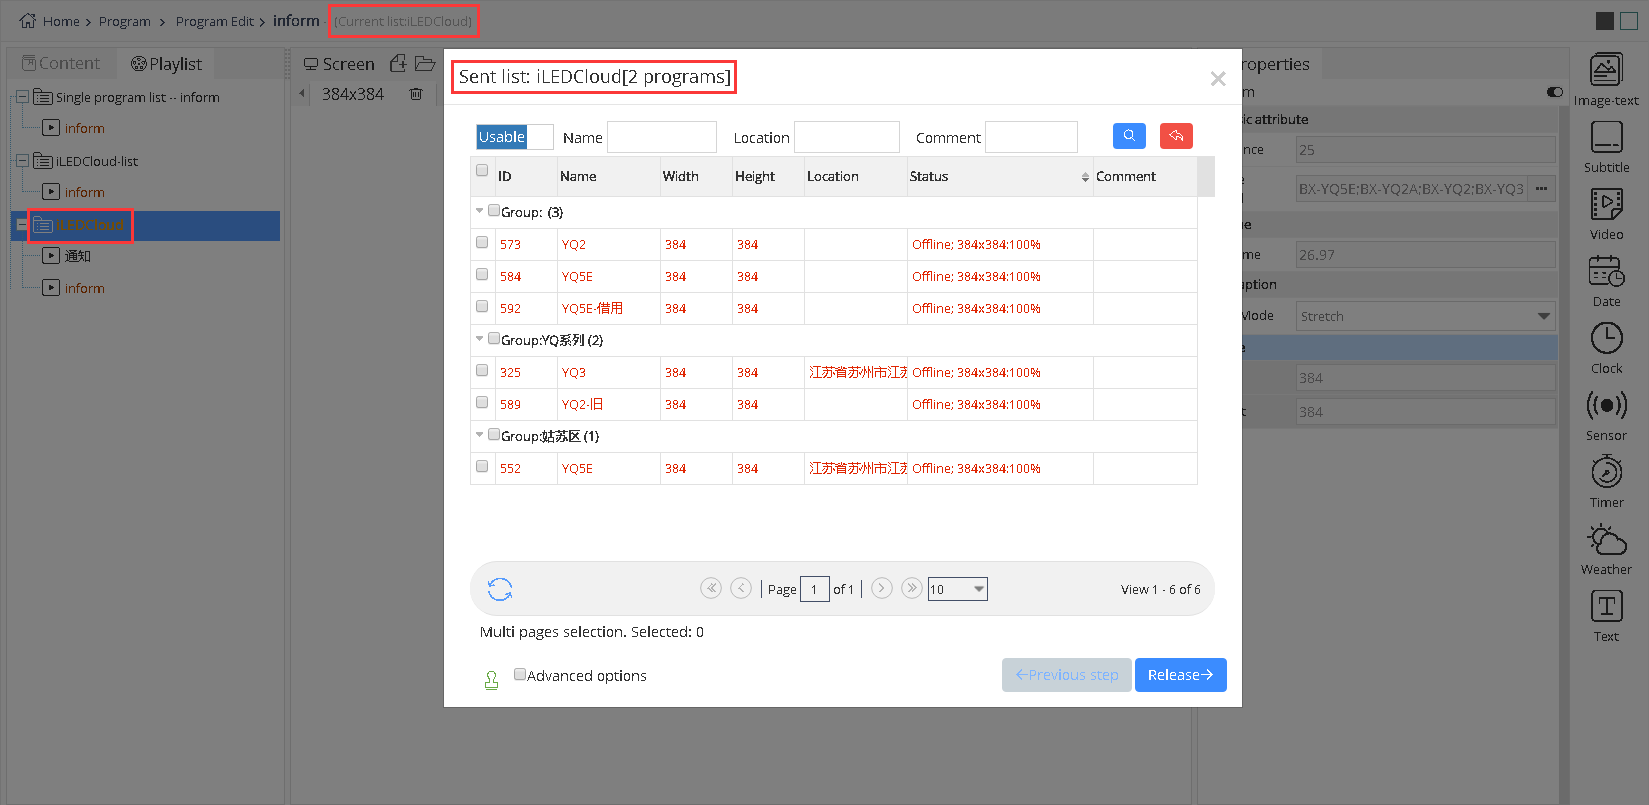
picture 5.3- 14
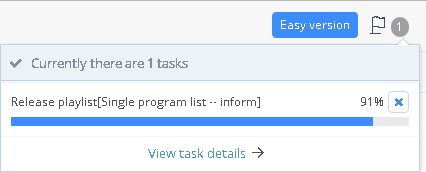
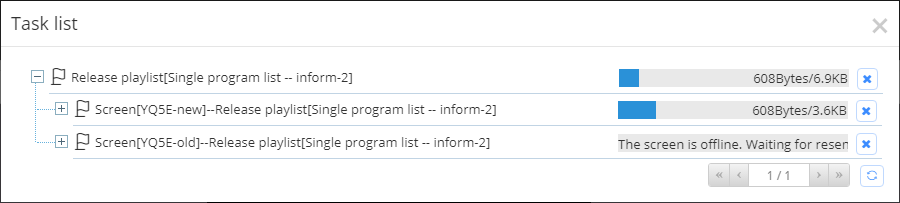
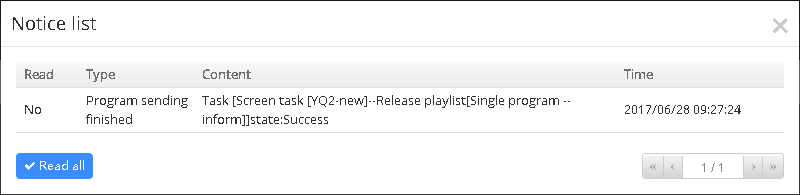
After finishing the program release wizard, you can check the release process in the top right corner of the page view as shown in picture 5.3-15,Now, iLEDCloud can be used to release, to operate as to create the releasing task for both online or offline screen,like picture5.3-16. For online screen, will release the program as usual; For offline screen, it will inform you that “the screen is not online, will resend automatically when it’s online”, if it is failed for 3 times, our platform will inform you and ask you to resend. Like Picture5.3-17.
picture 5.3- 14
picture 5.3- 15

picture 5.3- 16
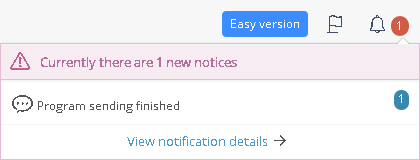
You can check here, whether the program is sent successfully.
picture 5.3- 18
picture 5.3- 19
5.3.1.2 Self-adaption function
Self-adaption function means the program can match with different sizes screen automatically in a fixed range.There are two programs types, multimedia program and text program.Multimedia program supports adding many sizes drawing boards. When users want to release programs, platform will count the matching rate, if the matching rate is over than 60%, the program will be sent successfully; If the matching rate is less then 60%, then, cannot. For this circumstance, users can add corresponding size drawing board as to solve this problem. Text program support only one size drawing board, and it can be 100% matched.
We also add the properties which is relative to program properties and zone properties. Add “scale mode” in program properties, it’s stretch and according to width and height. Add “scale mode”, “wrap line height”, “wrap lines number”, “font scale” in zone properties. Scale mode in zone is the same with program properties. Wrap line height, when users set value, if the zone height transcend the wrap line height, zone will do line feeds automatically, and the font size will be made by the properties of wrap line height, and it’s fixed. Wrap lines number means the zone will change to the lines which is set by wrap lines number and the font size will be changed by the height of zone. Wrap line height and wrap lines number influence the effect of line feeds in zone. If users set values for both, zone height transcends wrap line height, then, the contents in zone will change to the corresponding lines according to the value in wrap lines number. And with the bigger of zone height, font size will be bigger too; If users set only wrap line height, zone height transcends wrap line height, then, zone will do line feeds, the lines number is according to the zone height, and the font size is fixed. If both of them are 0, then, default is no “line feeds”. Font scale will valid only in this drawing board.
5.3.2 Program reviewing
User can view all program from program management as shown in the picture 5.3-20,there is some button notes like in the talbe 5.3-3.
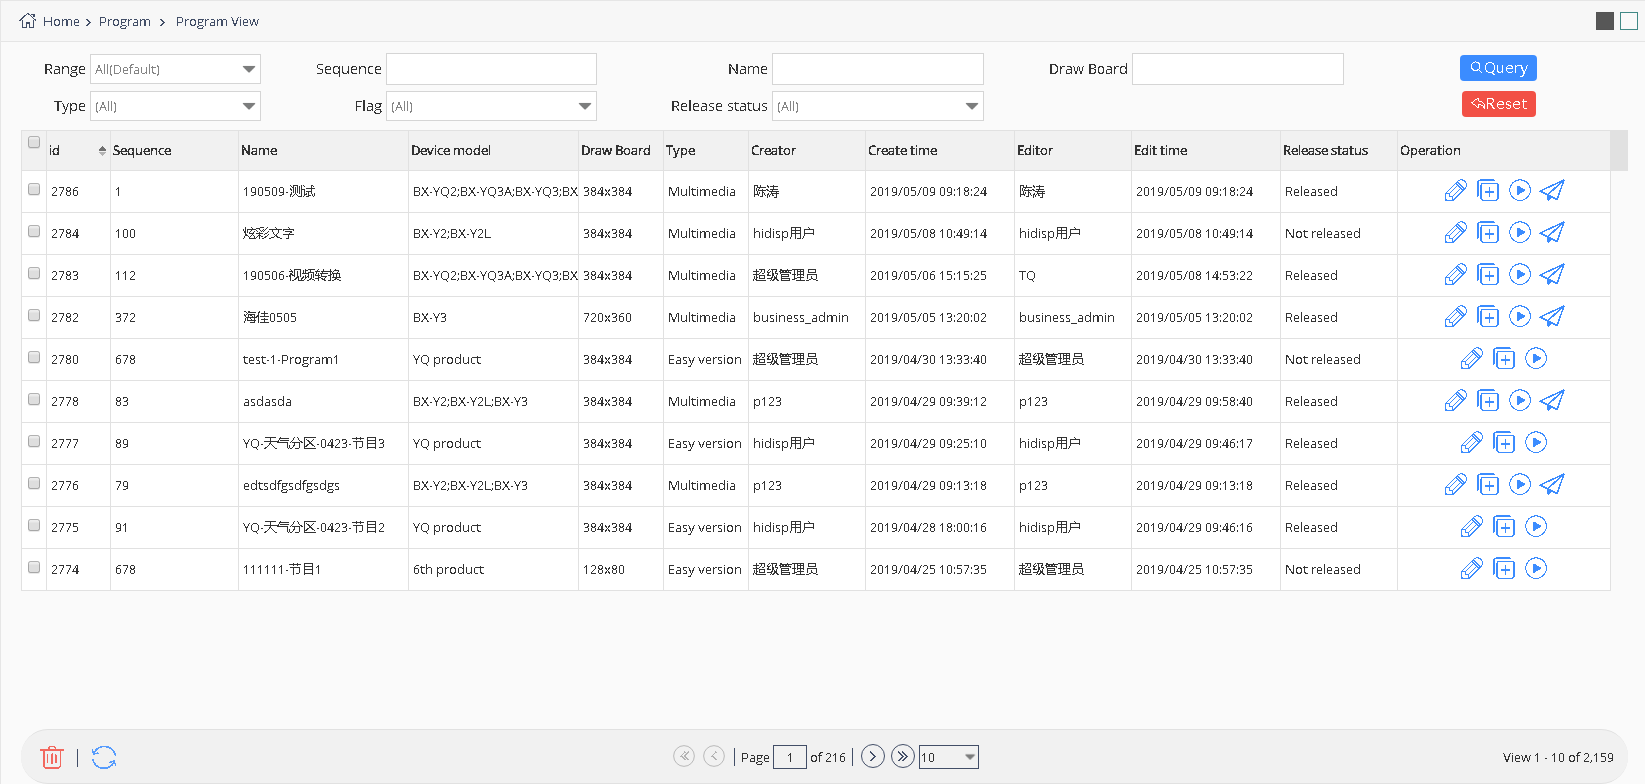
picture 5.3-20
| button | function |
|---|---|
 |
Edit program button ,click to create program ,user can modify it according to the original program.If user want to edit the program of simple version, a prompt message will pop up, after confirming user will enter the edit page of this program. |
 |
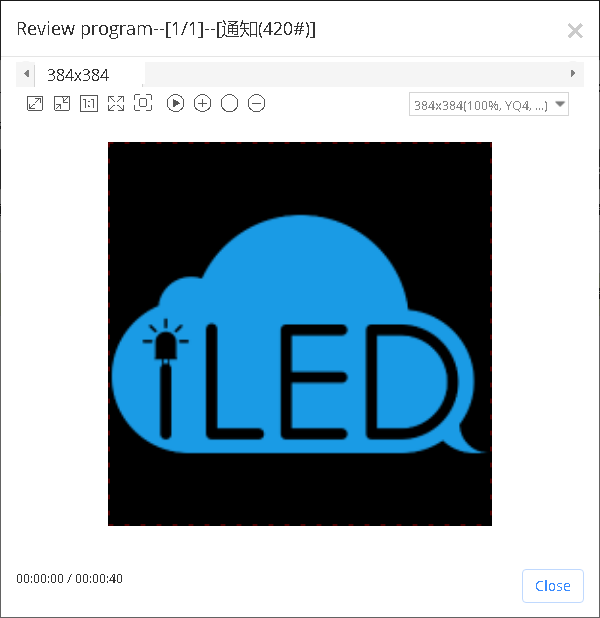
Preview button ,click and step into the preview page as shown in thepicture 5.3- 20 |
 |
Release button ,click and step into the release process as shown in the picture 5.3- 11~picture 5.3- 13 |
 |
Copy button , copy the present program |
table 5.3-3 program view button notes
picture 5.3- 21
5.3.2.1 Pre set program
When users add controller in our platform, it will add some programs automatically according to this controller (including text, graphic, video), as to give some simple testing programs for customers. Those pre set programs are added automatically, users cannot edit and cannot delete, and it will not waste your network flow which you already bought.
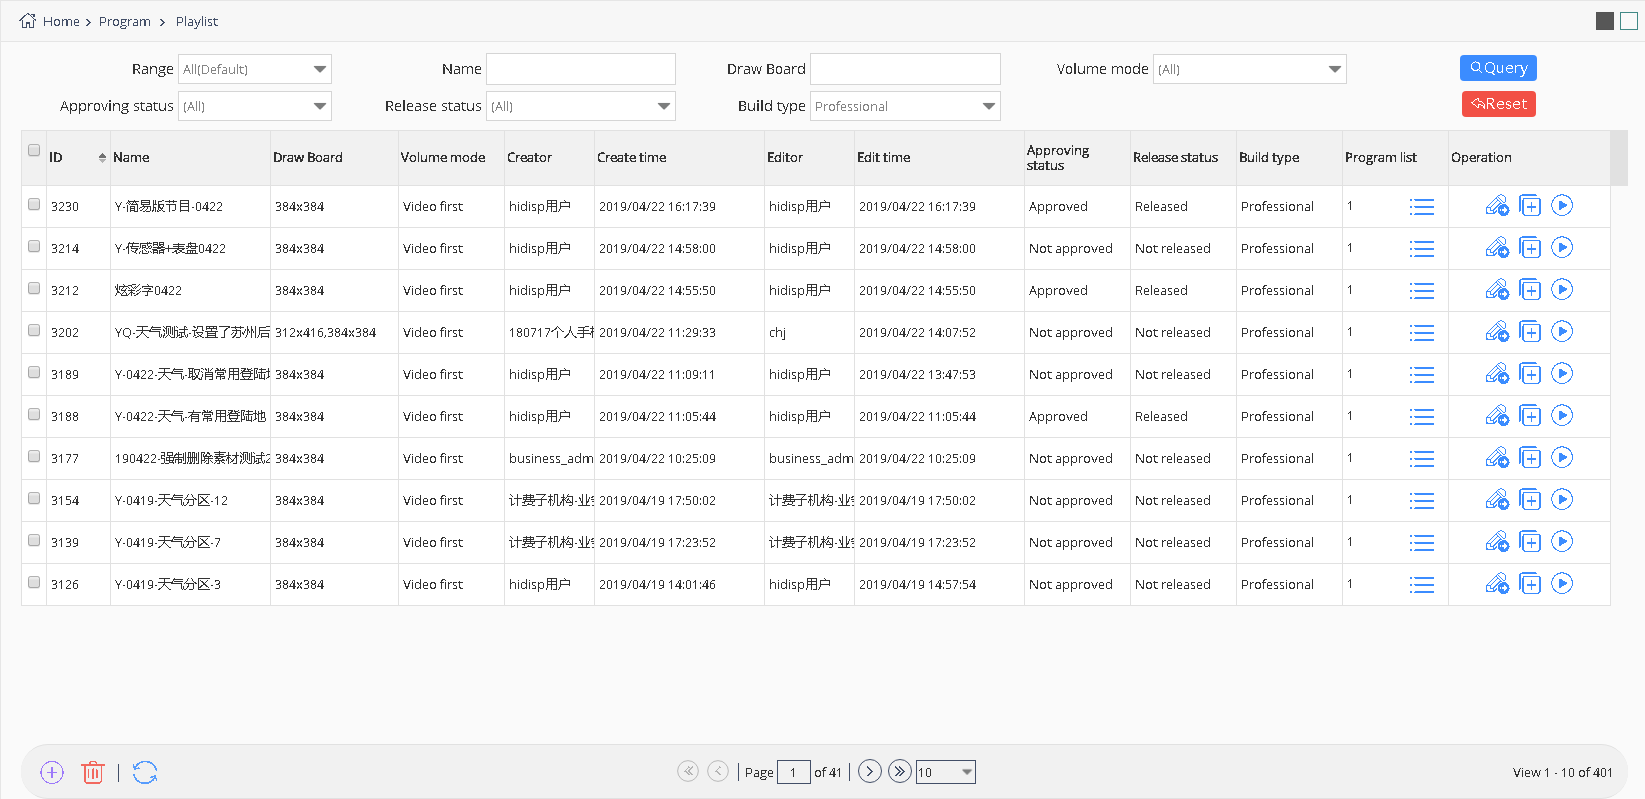
5.3.3 Playlist
Users can view all the playlist in the program management page ,as shown in the picture 5.3-22 ,and manage the playlist button as shown in the table 5.3-4
picture 5.3- 22
| button | function |
|---|---|
 |
Program list button ,click to view and edit the playlist as shown in the picture 5.3-23 |
 |
Edit button ,click to modify the playlist guide.If user want to edit the playlist of simple version, a prompt message will pop up, after confirming user will enter the playlist wizard interface of this playlist. |
 |
Play button ,click to preview the playlist |
|
Copy button , copy the present playlist |
table 5.3-4 playlist button function notes
If users want to edit playlists, can click program list button,as shown in the picture 5.3-23, can add ,edit view and make order adjustment, click the edit button to change the program mode and play time, click move up down button to set the program broadcast priorities order.
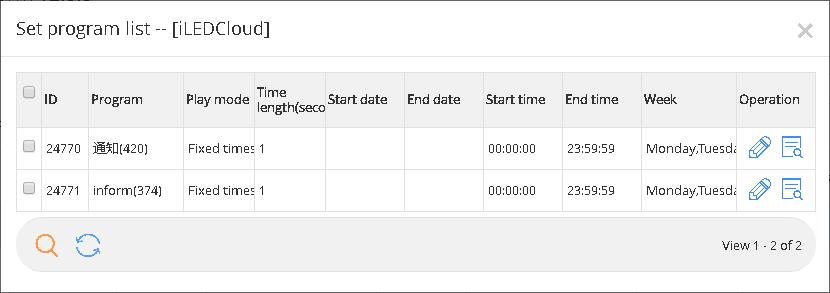
picture 5.3- 23
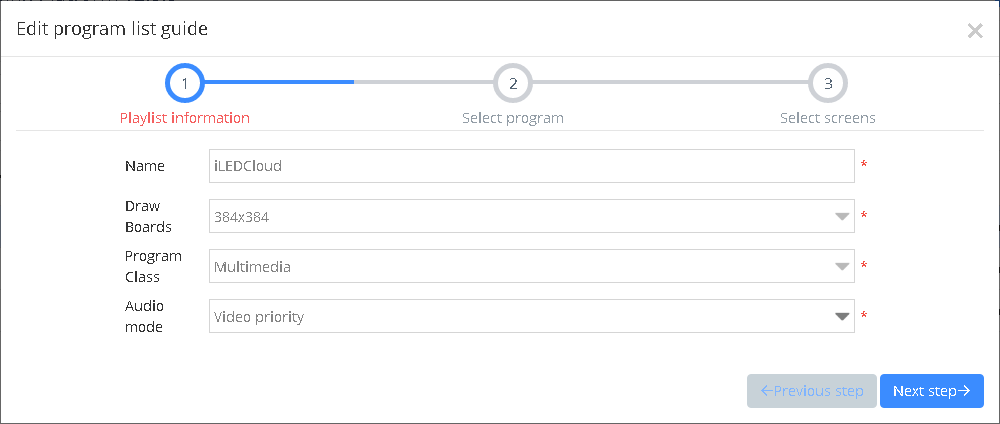
Users in the playlist page click add or edit button, will enter the playlist wizard interface, as shown in picture 5.3-24, users need to fill in the corresponding name,program drawing board and program types.
picture 5.3- 24
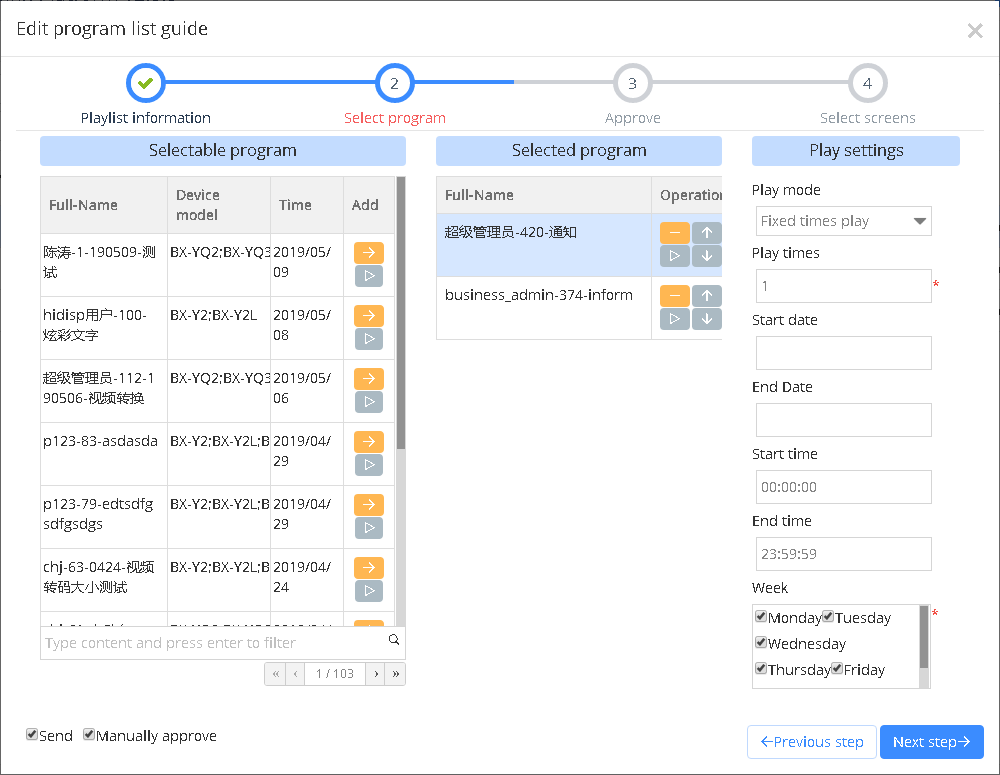
Then click "next step", as shown in picture 5.3-25, click the button"  ”add program to the playlist ,or view the program through button“
  ”remove the program by button“
  ”,after select “manually approve “release”s ,then will skip the review and release, simply
create list, after that need manually reviewed after release.
”,after select “manually approve “release”s ,then will skip the review and release, simply
create list, after that need manually reviewed after release.
picture 5.3- 25
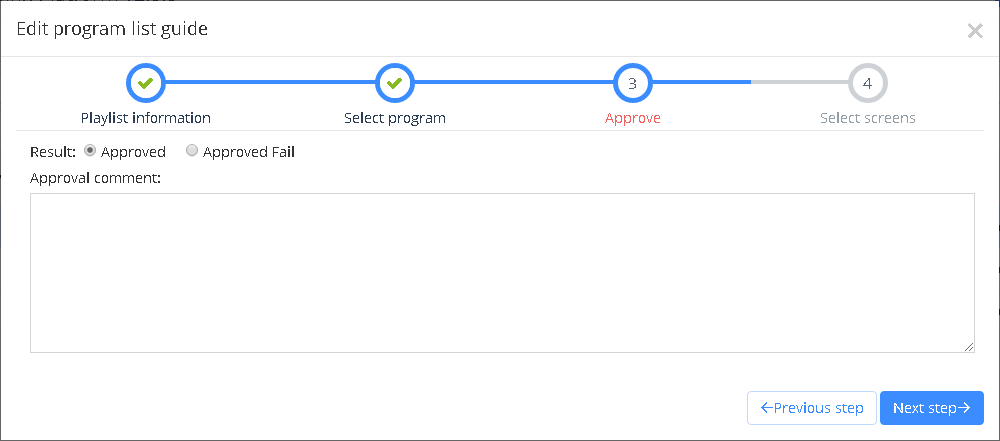
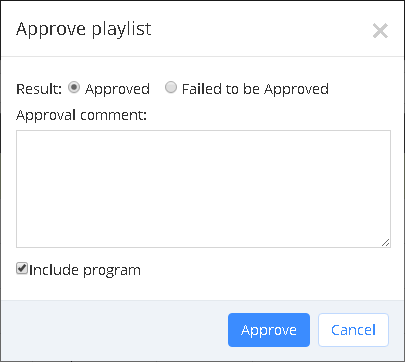
Click the next step to the manual approve interface as shown in the picture 5.3- 26 ,select the result as “approved”
picture 5.3- 26
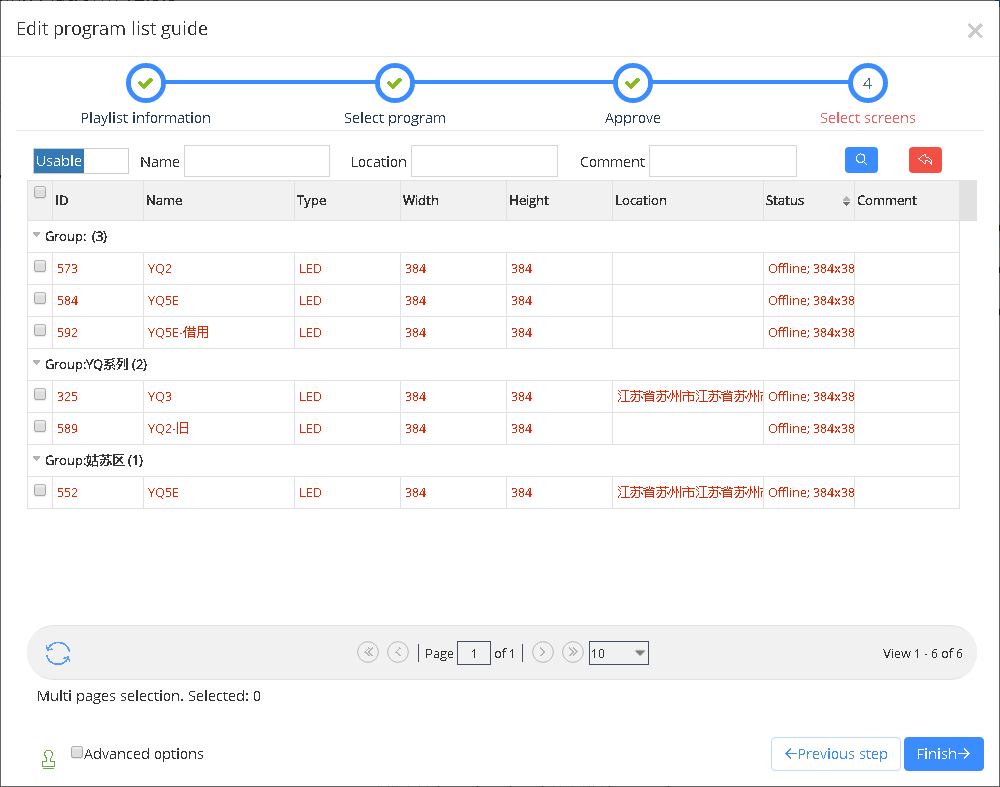
Click the next step button as shown in thepicture 5.3- 27,select the screen ,then will display the correspond usable screen ,user can view the screen status in the”all screen” option.
picture 5.3-27
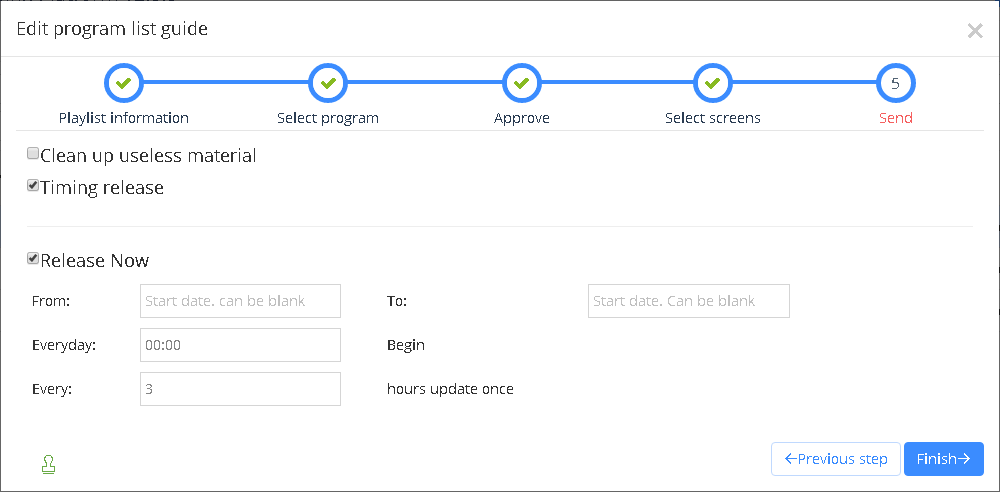
If user want to create auto task, need to check the “Advanced options” and click the next step as shown in the picture 5.3-28, users write the data then click finish will be ok.
picture 5.3-28
5.3.4 Program approve
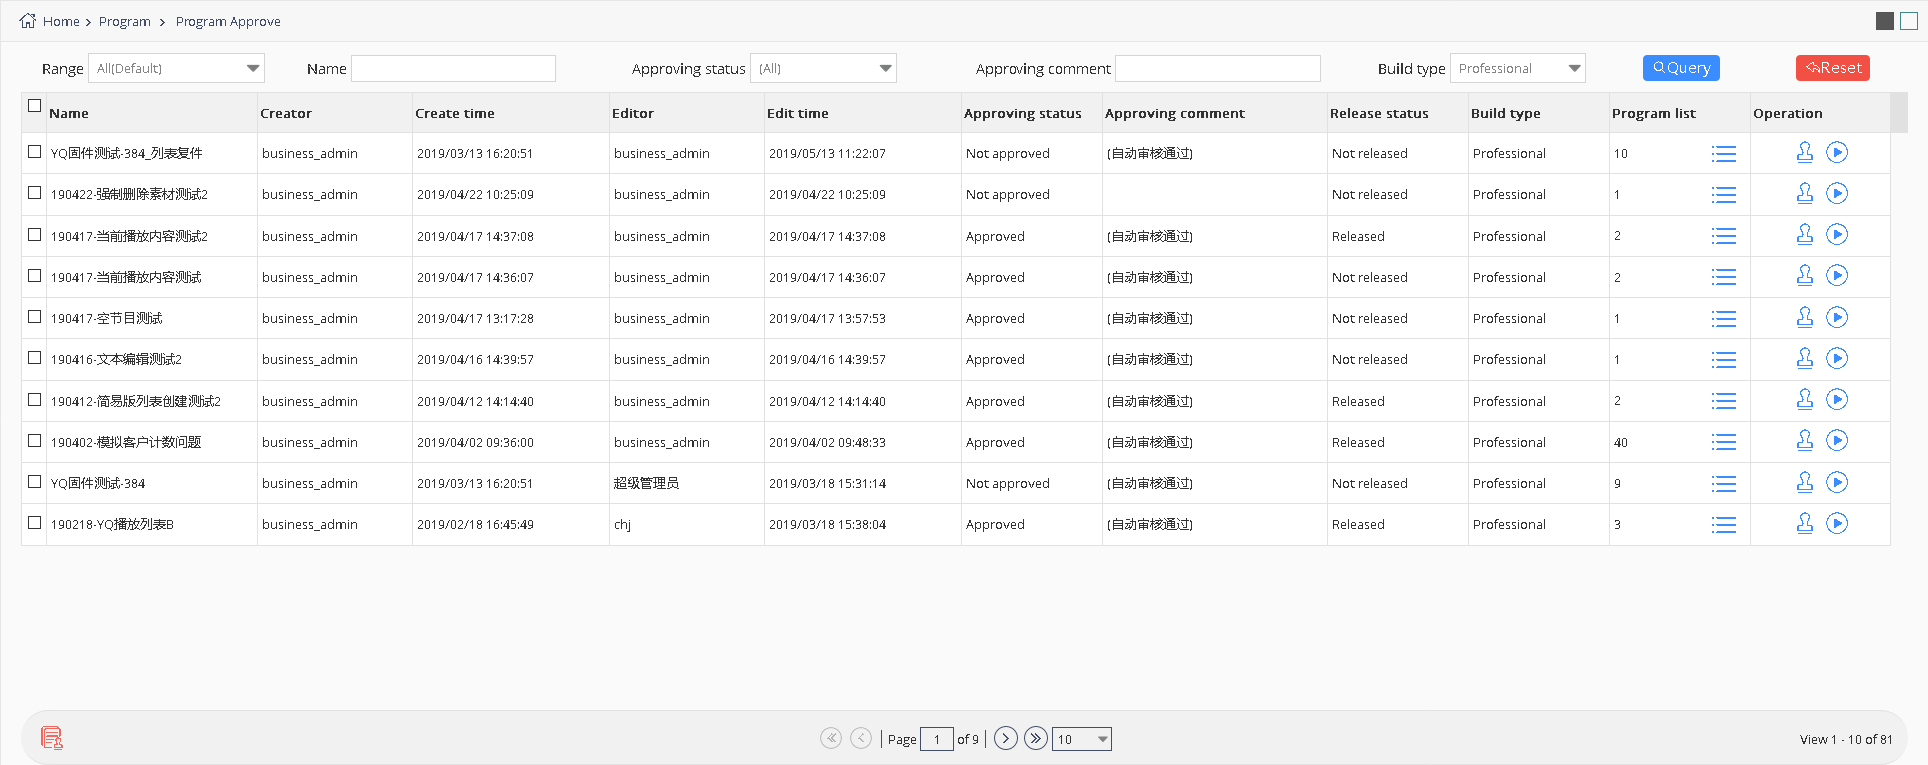
Users can see all the playlist in the program management as shown in thepicture 5.3- 29, there is button on the page as shown in table 5.3-5
picture 5.3- 29
| button | function |
|---|---|
|
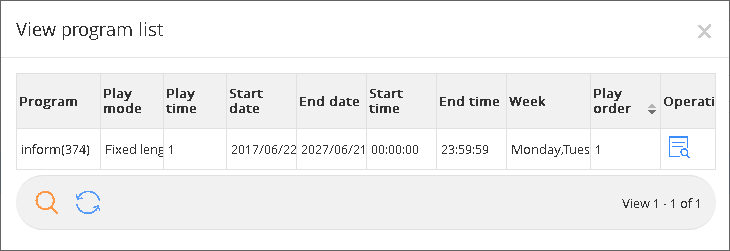
Program list button ,only can check current program list ,can’t edit or modify as shown in the picture 5.3- 30 |
 |
Program approve button ,can approve single or multiple program |
table 5.3-5 program approve function notes
picture 5.3- 30
user can click the button to approve the program by single or multiple as shown in picture 5.3- 31 to prevent duplicate audit, the audit button is hidden after the list audited.
picture 5.3- 31
5.3.5 Program releasing
User can view the in the approved playlist from program release management page (note:not allowed to release the failed audit program list), as shown in picture 5.3-32,user can view playlists, release and preview for each approved list.
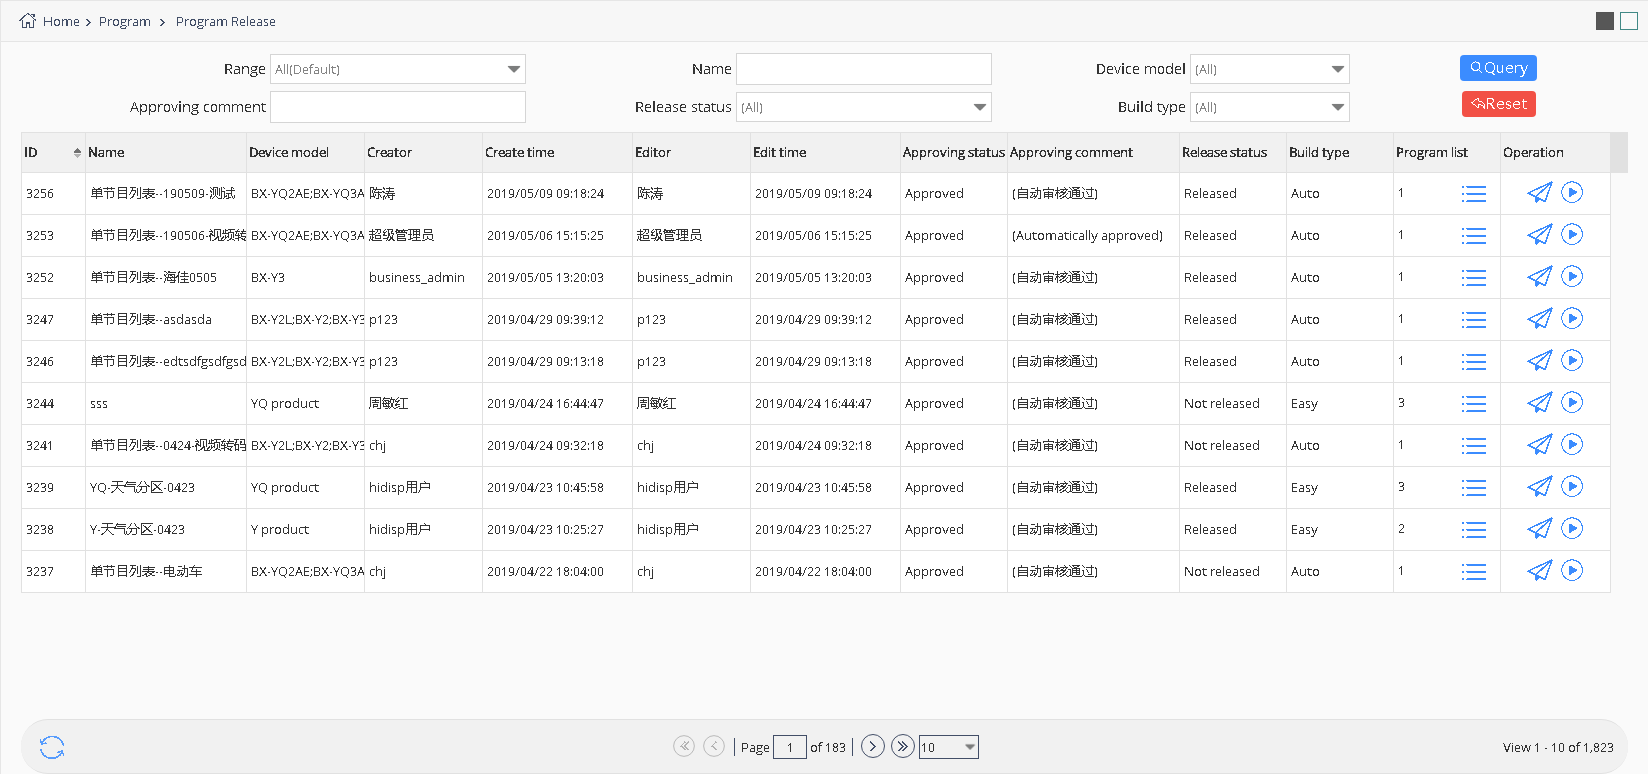
picture 5.3- 32
User click the release button of each playlist can step into the release interface as shown in picture 5.3- 33,user can select the next step to finish the release according to the release mode.

picture 5.3- 33 release
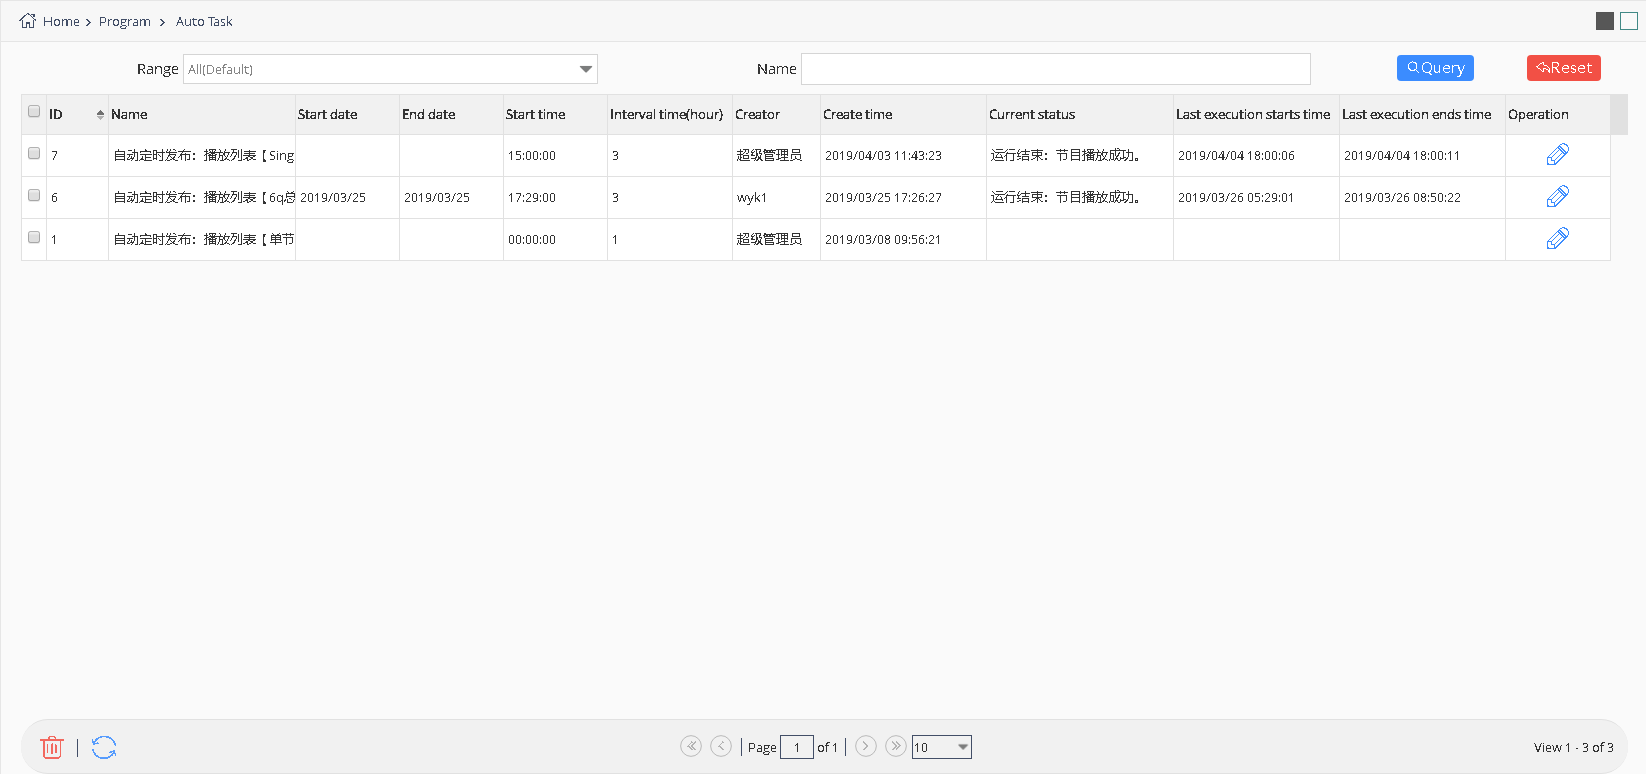
5.3.6 Automatically releasing
In program management of the automatic release task page, will show timing automatically release task at the end of the release program, as shown in picture 5.3-34.Users can modify, and delete operations, automatic release task modification operations can modify the task start date and end date, start time and interval time, delete operation requires users to select the corresponding tasks, then click the delete button.